
Google Business Profile Photo Size: The Complete Reference
Get the exact Google Business Profile photo size for every photo type, with recommended formats, file limits, and best practices for cover and thumbnail images.
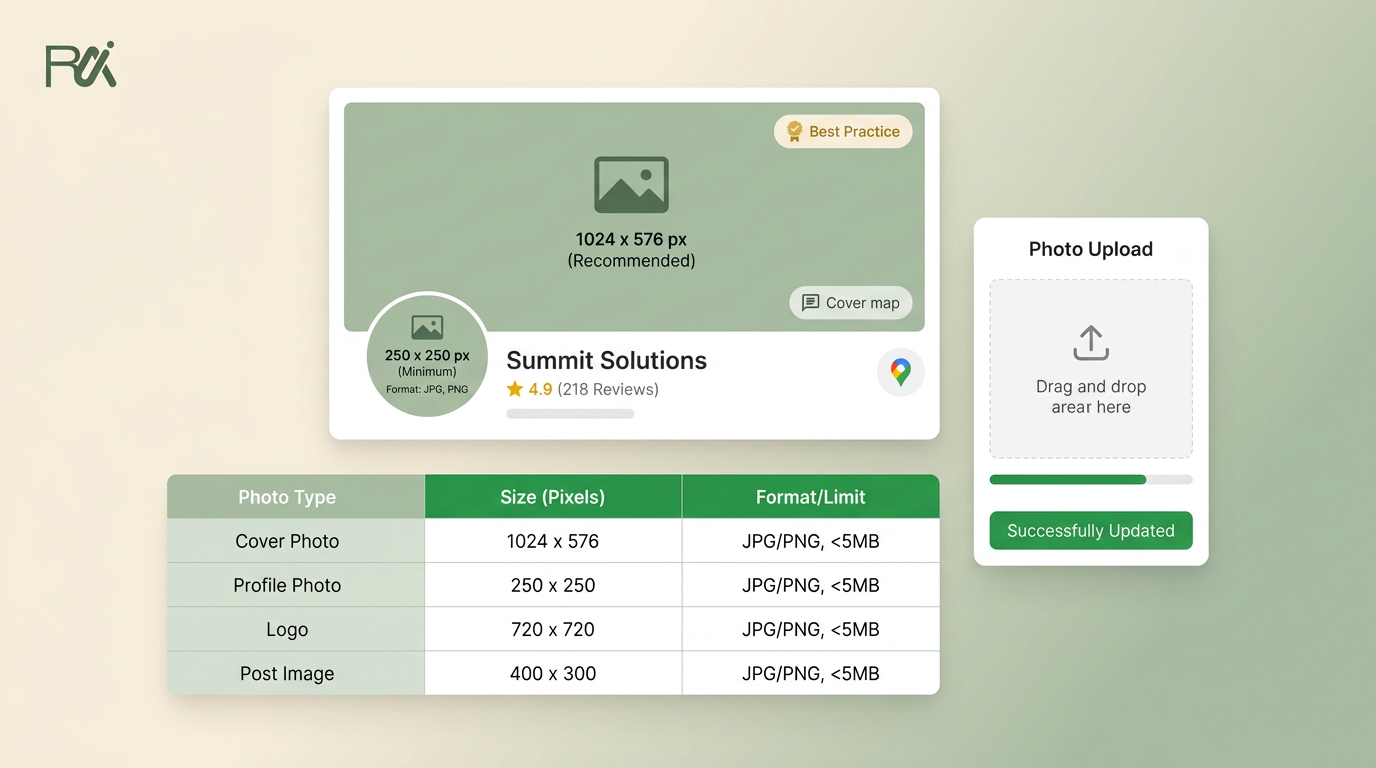
Table of Contents
- 1Introduction
- 2Why Your Photo Size Matters on Google Maps
- 3Photo Types and Their Exact Dimensions
- 4Logo
- 5Cover photo
- 6Interior and exterior photos
- 7Team and owner photos
- 8Work, product, and menu photos
- 9Quick Reference Table of Every GBP Photo Size
- 10File Format and Compression Basics
- 11How Each Photo Appears on Maps and Search
- 12Google Quality Rules That Affect Your Images
- 13What to check before publishing
- 14What to Shoot and Upload This Week
- 15Uploading and Replacing Photos in Your Profile
- 16Common Sizing Mistakes and How to Fix Them
- 17One-Page Reference Card
Introduction
The current recommended size for a Google Business Profile photo is 720 by 720 pixels, and every upload must be between 10 KB and 5 MB. The minimum resolution is 250 by 250 pixels.
It's Tuesday morning, and your contractor listing is showing a stretched cover photo on mobile while your logo looks grainy on desktop. A restaurant owner may see the same problem with a dining-room image that crops out the tables, and a salon manager may discover that a team portrait loses faces at the edges. The fix starts with choosing the right dimensions before you upload.
Why Your Photo Size Matters on Google Maps
Google's current Business Profile photo guidance sets a clear technical floor and ceiling. A standard photo should be 720 by 720 pixels, the minimum resolution is 250 by 250 pixels, and the file must stay between 10 KB and 5 MB.
Those limits protect the basic appearance of your listing. A file below the minimum resolution can look soft when Google displays it in a Maps thumbnail or Search panel. A file that exceeds the size limit won't upload properly. A square starting point also gives Google more usable material when it crops the image for different screens.
Practical rule: Start with a sharp square image at 720 by 720 pixels unless you're preparing a cover photo.
Google's quality guidance also emphasizes images that are in focus, well lit, and minimally altered, with the goal of representing reality. The platform's guidance is discussed in Google's photo-size support thread, and the point is simple: correct dimensions don't rescue a poor photograph.
For a contractor, that means a clear photo of the actual storefront or a completed kitchen. For a clinic, it means a clean reception-area image rather than a dark phone screenshot. For a hotel, it means showing the lobby or room guests will encounter.
Photo size supports trust and presentation. It isn't a confirmed ranking guarantee, and it shouldn't be treated as one. Your listing still needs accurate business information, genuine customer reviews, and a profile that reflects the business people will visit.
Photo Types and Their Exact Dimensions
Use the photo category to decide the canvas. Don't force every image into the same shape if the category calls for a different crop.
Logo
Prepare your logo as a 720 by 720 pixel square. Keep the mark centered with breathing room around it because Google may display it inside a circular treatment. A salon should use a clean wordmark or symbol that remains readable when reduced. Avoid placing small text around the outer edge.
Cover photo
Use 1080 by 608 pixels, at roughly a 16 by 9 aspect ratio, for the wide cover image. A restaurant can use a well-lit dining-room scene, with the main subject placed near the center so the crop doesn't remove the chef, tables, or key architectural detail.
The cover is the exception to the square baseline. It needs a wide composition, not a square image stretched into a banner.
Interior and exterior photos
Use 720 by 720 pixels for interior and exterior images, with a minimum of 250 by 250 pixels. A contractor might show the shopfront, while a finished-kitchen photo can show the quality of the work. A hotel can use the same approach for a lobby, guest room, or entrance.
Shoot straight when possible. Tilted walls and excessive empty ceiling make a space look smaller and less cared for.
Team and owner photos
Use 720 by 720 pixels for head-and-shoulders portraits. Frame the person clearly and leave enough space around the head for mobile cropping. A clinic can feature the practitioner, a salon can show the stylist, and a contractor can introduce the owner or crew lead.
Quick Reference Table of Every GBP Photo Size
Use this table as the single lookup point when you're preparing an upload. Any photo type not listed here defaults to the 720 by 720 pixel standard, while the file limit remains 10 KB to 5 MB.
| Photo Type | Recommended Size (px) | Minimum Size (px) | Aspect Ratio | Max File Size |
|---|---|---|---|---|
| Logo | 720 × 720 | 250 × 250 | 1:1 | 5 MB |
| Cover photo | 1080 × 608 | 250 × 250 | Approximately 16:9 | 5 MB |
| Interior | 720 × 720 | 250 × 250 | 1:1 | 5 MB |
| Exterior | 720 × 720 | 250 × 250 | 1:1 | 5 MB |
| Team or owner | 720 × 720 | 250 × 250 | 1:1 | 5 MB |
| Work or product | 720 × 720 | 250 × 250 | 1:1 | 5 MB |
| Owner video | 720p or higher | 720p | Video format | Not specified here |
Logo
Cover photo
Interior
Exterior
Team or owner
Work or product
Owner video
The table separates the wide cover from the square categories so you can choose the right file before opening Google Maps. If you're planning professional business portraits or milestone-style photography, you can also browse maternity and milestone sessions for ideas on lighting, framing, and subject placement that translate well to team and owner images.
Don't mistake the minimum for the target. A 250 by 250 pixel file may meet the floor, but a properly composed 720 by 720 pixel upload gives you a stronger working source for thumbnails and crops.
File Format and Compression Basics
For routine uploads, choose JPG for photographs and PNG for logos or graphics that need transparency. WEBP can work well when your editing software exports it cleanly, but the correct dimensions and visual quality matter more than chasing a particular extension.
| Format | Best Use | Typical File Size | Transparency | Recommendation |
|---|---|---|---|---|
| JPG | Interiors, exteriors, food, products | Varies by image | No | Best default for photos |
| PNG | Logos, graphics, transparent assets | Varies by image | Yes | Use when sharp edges or transparency matter |
| WEBP | Modern photo exports | Varies by image | Can support it | Use when your export workflow handles it reliably |
JPG
PNG
WEBP
Avoid repeatedly opening and resaving JPG files because each save can reduce detail. Export once from the original, inspect the result, and keep the untouched master separately. A guide to best image formats for performance can help if you also use the same files on your website.
Set the color profile to sRGB so colors are less likely to shift between your editing software and Google surfaces. DPI isn't the deciding factor for Business Profile display. Google works from pixel dimensions, so concentrate on the width and height, not print settings.
Keep a high-resolution master, such as the original camera file or an untouched export, outside Google. Google processes uploaded images, so the uploaded file shouldn't be your only copy. For a contractor with a large batch of job photos, resize and compress the set together, then check every file against the 5 MB ceiling before uploading.
How Each Photo Appears on Maps and Search
A square upload can be cropped differently across Maps and Search. Keep the logo, face, sign, or finished work near the center, with enough surrounding space for Google to trim the edges.

On desktop Maps, a cover photo may appear as a wide banner. Center the subject in restaurant, salon, and contractor images so side cropping does not remove it. Cut empty ceiling and floor from the composition before upload.
Mobile Maps reduces photos to small, tappable thumbnails. Dark rooms, tiny faces, and crowded scenes become hard to read at that size. Search may arrange the logo, cover, and additional photos differently, so keep text and important details away from the edges.
Check your published profile on both a phone and a desktop computer. A salon owner might discover that a waiting-area photo shows only a wall and lamp on mobile. Re-centering the seating and faces fixes the display problem, even when the file meets the pixel requirement.
Strong images support profile trust. Clear customer photos in reviews can reinforce that visual credibility. See this discussion of why photo reviews are becoming more important in Google for related guidance.
Google Quality Rules That Affect Your Images
Google's size requirements are only the first check. Its photo guidance prioritizes images that are in focus, well lit, minimally altered, and representative of reality.
A technically large image can still be unsuitable. A blurry night photo remains blurry when exported at a larger size. A heavily filtered dining room can misrepresent the space. A screenshot of a menu isn't a substitute for a clear food or interior photo, and an image that doesn't show the actual business can weaken customer trust.

What to check before publishing
The sizing and quality rules work together. A sharp image at the recommended size is useful. A blurry image at a much larger size still fails the practical test because customers judge what they can see, not the number in the file properties.
Shoot near windows when possible, clean the lens, and export from the original image rather than a phone screenshot. If Google rejects an upload, correct the underlying issue instead of repeatedly submitting the same file.
- Focus: Zoom in on faces, signs, food, and finished work. If the important detail is soft, retake the image.
- Lighting: Use daylight or balanced indoor lighting. Don't rely on a dark image and hope compression will improve it.
- Authenticity: Show the actual location, team, service, product, or completed job.
- Editing: Keep filters light. Don't cover the image with promotional text, watermarks, or decorative effects.
What to Shoot and Upload This Week
You don't need a full production day. Build a small, useful set in this order.

Use JPG for most photographs and PNG for a logo when transparency matters. Review local business listing essentials alongside your image work so the photos support accurate business information rather than standing alone.
For restaurants, prioritize the dining room and recognizable dishes. For salons, include chairs, finished work, and the people providing the service. For contractors, show the shop or service vehicle, crew at work, and completed results. Replace stale images as part of your normal operating routine, and check the finished listing on the devices your customers use.
- Cover and exterior: Prepare the cover at 1080 by 608 pixels and the exterior at 720 by 720 pixels. Show the restaurant entrance, salon frontage, clinic doorway, hotel exterior, or contractor shop.
- Interior and atmosphere: Add several 720 by 720 pixel images. Show seating, treatment rooms, reception, work areas, or finished spaces.
- People: Upload 720 by 720 pixel team or owner portraits. Use natural expressions and uncluttered backgrounds.
- Products and work: Add square photos of menu items, finished styles, completed kitchens, repairs, or products. Keep the actual subject prominent.
- Service in progress: Show a stylist working, a chef preparing food, or a contractor completing a job, provided customers and staff are shown appropriately.
Uploading and Replacing Photos in Your Profile
Google has moved many Business Profile editing tasks into Google Search and Google Maps, so the exact labels may vary by account view. The working sequence is still straightforward.

Before uploading, inspect the file size and dimensions. Files under 10 KB can fail, while files above 5 MB exceed the stated limit. HEIC and RAW files may also cause trouble in a browser workflow, so export a compatible JPG or PNG first. For a wider profile maintenance routine, use this Google Business Profile checklist for 2026.
Don't assume the upload is visible everywhere immediately. Check Maps first, then Search later, because the two surfaces can update at different times.
- Open the profile: Sign in to the Google account that manages the listing and open the correct location.
- Choose Photos: Select the photo area from the profile controls.
- Add the file: Choose Add photo, select the correct category, and pick the file from your computer or device.
- Confirm the category: Use Logo, Cover, Interior, Exterior, Team, or Work where available.
- Replace when needed: Open the existing image's options and choose the replacement command, then upload the corrected version.
Common Sizing Mistakes and How to Fix Them
Most photo problems come from using a file that was prepared for another platform. The image may look fine in your phone gallery but fail after Google crops it for a small listing preview.
| Mistake | What It Looks Like | One-Line Fix |
|---|---|---|
| Portrait phone photo | Heads, signs, or products are cut off | Reframe as 720 × 720 for standard photos or 1080 × 608 for the cover |
| Old horizontal banner | Stretched edges or an awkward crop | Re-export the original for the wide cover composition |
| Oversized camera export | Upload rejection or an unnecessarily heavy file | Downsize the long edge while keeping the image sharp |
| PNG screenshot | File exceeds the upload ceiling and looks soft | Export the original image as JPG instead |
| One logo used everywhere | Interior and work categories look repetitive or incorrect | Prepare each category with the correct subject and canvas |
Portrait phone photo
Old horizontal banner
Oversized camera export
PNG screenshot
One logo used everywhere
Don't resize a bad composition and expect it to become useful. If the subject is cut off in the original, return to the original photograph and create a better crop. If a screenshot is the only available source, recreate the asset from the original whenever possible.
One-Page Reference Card
Pin this beside the computer used for profile updates.
Universal rules
By type
Before uploading, confirm the file size, inspect the short side, check focus, and remove heavy filters. Portrait crop problem? Reframe it. Wrong cover shape? Export a wide version. Oversized file? Compress or resize it. Screenshot too heavy? Use the original and export a JPG.
---
RecensioAI B.V. helps local businesses manage review requests, profile audits, Google Business Posts, and multi-location activity from one system. If you want your photos and the rest of your Google Business Profile kept organized while customers choose between public reviews and private feedback, visit RecensioAI B.V..
- Standard photo: 720 × 720 pixels, square.
- Minimum resolution: 250 × 250 pixels.
- File size: 10 KB to 5 MB.
- Cover photo: 1080 × 608 pixels, approximately 16:9.
- Formats: JPG, PNG, or a compatible WEBP export.
- Quality: Sharp focus, useful lighting, minimal editing, real business content.
- Logo: 720 × 720, square, centered.
- Cover: 1080 × 608, wide composition.
- Interior and exterior: 720 × 720.
- Team and owner: 720 × 720.
- Work, products, and menu items: 720 × 720.
- Video: 720p or higher.
You might also like
Handpicked articles for you
Hotel Review Management: Automate Post-Stay Requests with Apaleo, Mews and Your PMS
A practical guide to turning hotel checkouts into timely review requests, with Apaleo live, Mews early access and flexible PMS alternatives.
Why the Business Around the Corner Beats You on Google: What 21,373 Profiles Reveal
We compared 21,373 Google Business Profiles with their three strongest nearby competitors. The gap is smaller than most owners think, but it has two sides: rating and volume.
Treatwell Review Management for Salons: One Reputation View Alongside Google
Bring your public Treatwell rating and recent reviews into RecensioAI, then combine salon signals with Google for faster, better decisions.